

~Fairy Friends Tut 2nd Page~
In the picture below you will see the cloning brush tool and settings I used. However note size should vary depending what size of area you are working in.
To start cloning you must place the mouse pointer on the part of the body you want to clone from, example is on the previous page where my circle is. You must hold down the shift key, then click the right mouse button then release the shift key and use the left mouse button and drag your mouse over the parts of the body that have hair.
*NOTE: YOU MUST PAY ATTENTION, ZOOM IN WHERE NECESSARY, TAKE YOUR TIME AND BECAREFUL. WHILE USING THE CLONING BRUSH TOOL AS YOU MOVE YOUR MOUSE FROM ONE SIDE TO ANOTHER OR UP AND DOWN IT WILL START CROPPING FROM WHERE YOU CHOSE BUT IF YOU GO TO FAR WITH THE MOUSE YOU WILL SEE THAT IT MAY START CLONING SOME OF THE HAIR, CLOTHES OR SOMETHING ELSE THAT YOU DID NOT WANT THERE. I WOULD HIGHLY RECOMMEND DOING SMALL SECTIONS AT A TIME.

Also, if you notice her arms appear quite dark, so try cloning some of that to. The neck area may need to be cloned as well. Once your done cloning, remember to use your eraser tool at size 3 and smooth edges or erase any cloning that went out of the area you wanted it in.
Then using the same techniques from lesson 1, select the body and fill the skin layer on a new raster layer!!!
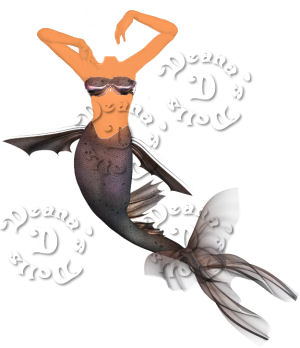
See my sample below to see what it should look like once your done with cloning. Once done you should have your skin fill layer and the original tube layer. Keep it this way and safe as LESSON4DEANA.PSP (YOUR NAME IN PLACE OF DEANA, PLEASE).
NOW WERE GOING TO GO INTO PART 2 OF YOUR LESSON: WE NEED TO MAKE THE ORIGINAL BODY TUBE A LITTLE LIGHTER, SO OUR DOLL BODY COMES OUT BETTER TO MATCH THE FACE.
Ok, while on the skin fill layer choose selection all, then with your magic wand click on the skin somewhere without moving it around, (sometimes when you click on things with the magic wand they will move, but we don't want that, so steady hand here). Now your skin fill layer will have the marching ants around it, please take your mouse and put it on the layer on the left (where the names of the layers are) it is the layer with the original tube and then go the top of your image, the blue bar at top of it and right click and choose cut, then click new raster layer, then paste into selection, you should have 3 layers, original tube, body original, and skin fill. Great work, now save it again.
Now go to the original body tube and choose adjust brightness and contrast 10 and 10.
Save it now and copy merged and paste as a new image and resize to something you like. Save as Lesson4Deana2.psp, and save your body you made as Lesson4DeanaBody.psp, this is the second part of this lesson.
Note the neat thing about saving your tube this way, lets say you need to make the body ethnic, you can come in and choose the skin fill layer and fill it with the matching color of face and fill, but don't save any changes to the psp file at this time. You can see image above for reference to color of body.
Please click the next button for continuation of tutorial.

|
|


