

~Fairy Friends Tutorial 1~
How to make a body!
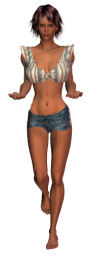
~Below is the tube you need for this lesson,
please click on file to download.
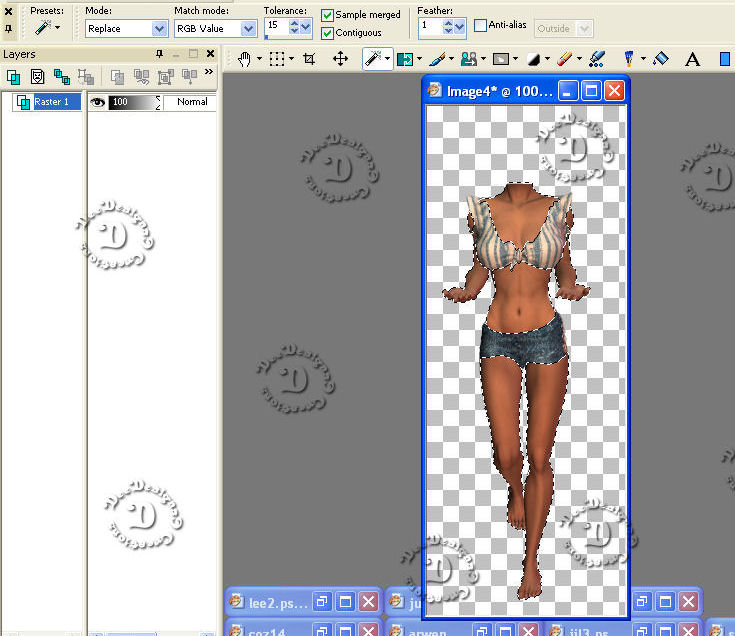
 Open up lesson1Body.pspimage. Then go to selection tools, choose square selection, with the settings: Rectangle (type),
mode REPLACE, Feather 1.
Open up lesson1Body.pspimage. Then go to selection tools, choose square selection, with the settings: Rectangle (type),
mode REPLACE, Feather 1.
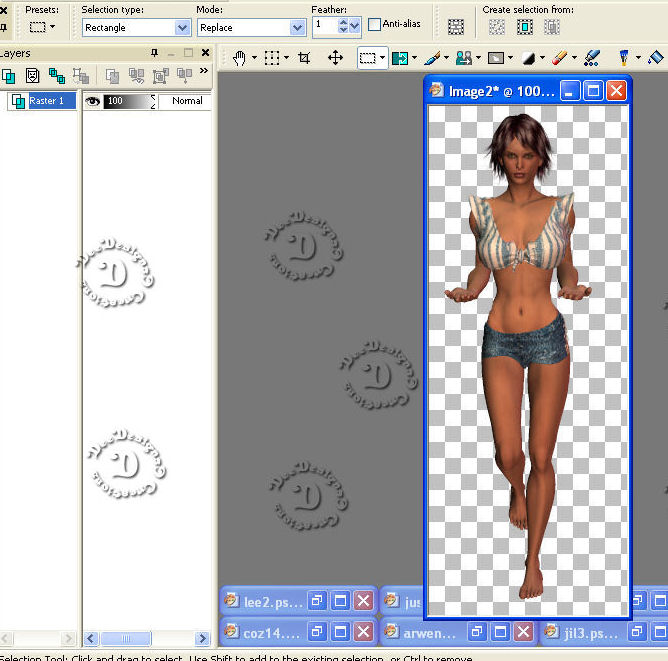
Select her head, down to her chin and click on delete, all you have left is her neck down.
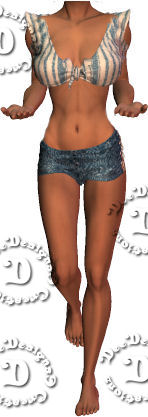
Here is what it should look like now...
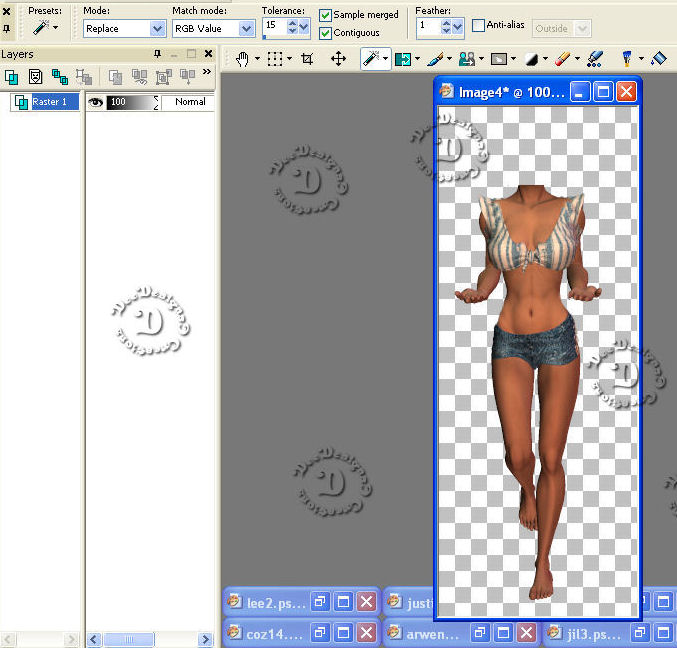
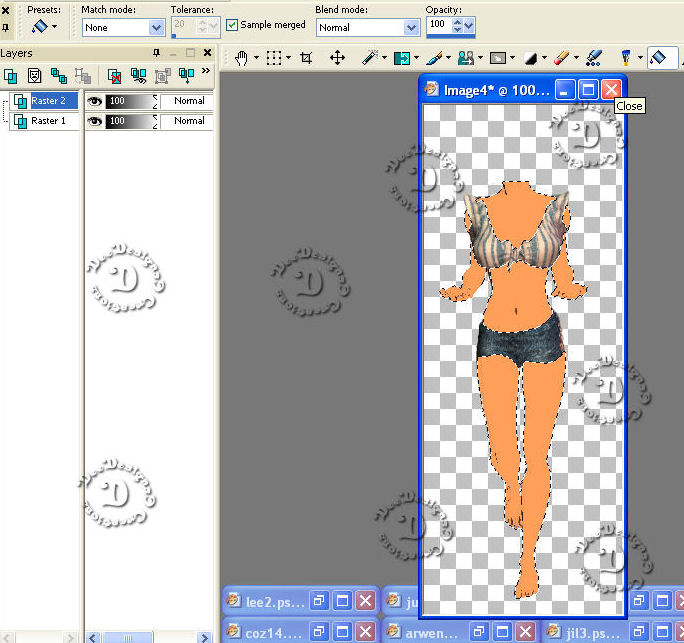
Take your magic wand and apply these settings, mode is replace, match mode is RGB Value, tolerance is at 15,
sample merged checked, contiguous is checked. Feather 1.
Take magic wand and hold down shift key, click on all parts of skin, (You may want to zoom in to enlarge,
so you can see that you are selecting all the skin.)
Do not deselect. Add a new raster layer with these settings:

Make sure your on raster layer 2. Go to your palette make your foreground color #FF9F59. Click on your flood fill tool,
click on the skin on all of the body. Your skin should all be changed now to look like:
Now look at this image, you can see all the dark spots on it that did not fill in. The next step will lead you through filling it all in.
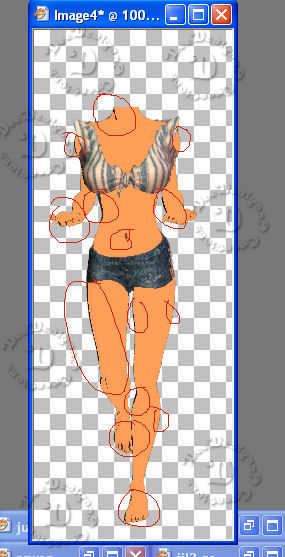
Select NONE. Go to raster layer 2, move your opacity bar to 80. While still on raster layer 2, choose paint brush tool.
Use these settings; square, size 1, hardness 50, steps 25, density 100, thickness 100, rotation 0, opacity 100,
blend mode normal, Foreground color #FF9F59. Fill in all the dark areas with your paint brush tool on these settings.
Note* Zoom in to enlarge. Fill in all the dark spots that did not fill in with the flood fill tool. Make sure you fill in any dark shading around body.
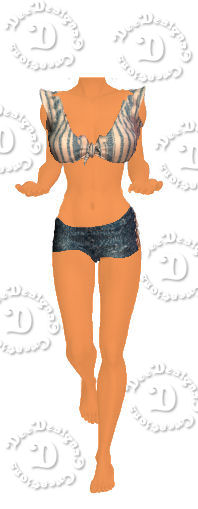
Zoom smaller to make sure it looks good. Sometimes when you are coloring a body, you need to fill over where it filled because the
shading didn't fill in correctly. Here is what you should have so far....
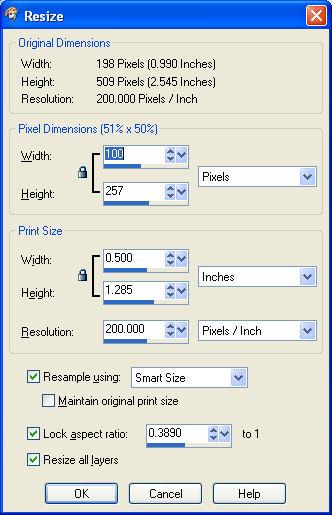
Now right click on blue bar at top of body image and choose copy merged and paste as a new image,
use these settings to resize the new body image:
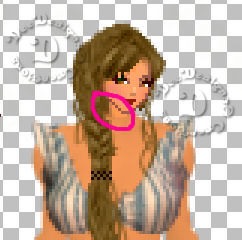
Save that body file as a psp file. Then copy it and start a new image and use your doll head or one we provide, add it to your new body and merge layers. Then make sure your neck is colored in to match body.
We don't want the neck making the whole head look off. In the pic below you can see the difference in colors and how it needs to match.
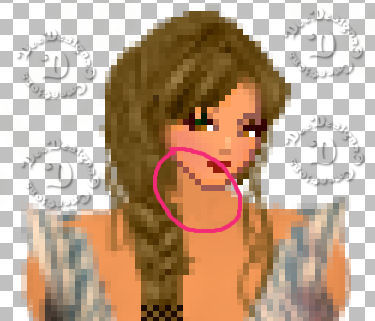
See in my pic below how it shows the smoothness and color match of neck and chest area? Once your done with that add your name and save as a jpeg. Then send me the psp file and the jpeg, you may attach them at Delphi, if you cannot then email them to me by addy I provided in the doll class folder.
Finished Doll. :) Congratulations, your on your way to making your own bodies! Woohooo!!!!

Doll Body Tut Created by Deana, copyrighted to me. You may not take it and share it anywhere. You may only use it for our lessons at Fairy Friends University.
If someone wants to learn please send them our way and we will gladly provide them with our tuts and time. Thank you!

|
|


